
Have you seen the actual hologram, for real? If not, it will take you about 20 minutes to get your own pyramid shaped hologram display.
If you've been following the latest trend in phone technology, then you know that holographic displays are the next big thing.
But what if you don't want to wait for your phone manufacturer to release a model with this feature?
Turns out that you can do it yourself, at home! In this blog post, we'll show you how to create your own hologram using nothing more than your smartphone and a few simple materials. Let's get started!
Holograms are three-dimensional images that are created by shining laser light onto a surface. They have been used in movies and television for years, but it is only recently that holograms have become available to the general public.
Thanks to advances in technology, it is now possible to create holograms using nothing more than a cell phone.
Source : Togo
How to create an hologram with a cellphone ?
There are a few different ways to create holograms with your cell phone. One popular method is to use a special app that generates hologram images. These apps typically work by displaying the hologram image on your phone screen while you hold the phone in a specific position.
Another way to create holograms is to use a 3D printer. These printers can be used to create physical objects that can then be viewed as holograms using your cell phone.
No matter which method you choose, creating holograms with your cell phone is a fun and easy way to impress your friends and family. With a little practice, you’ll be able to create stunning holographic images that will amaze everyone who sees them.
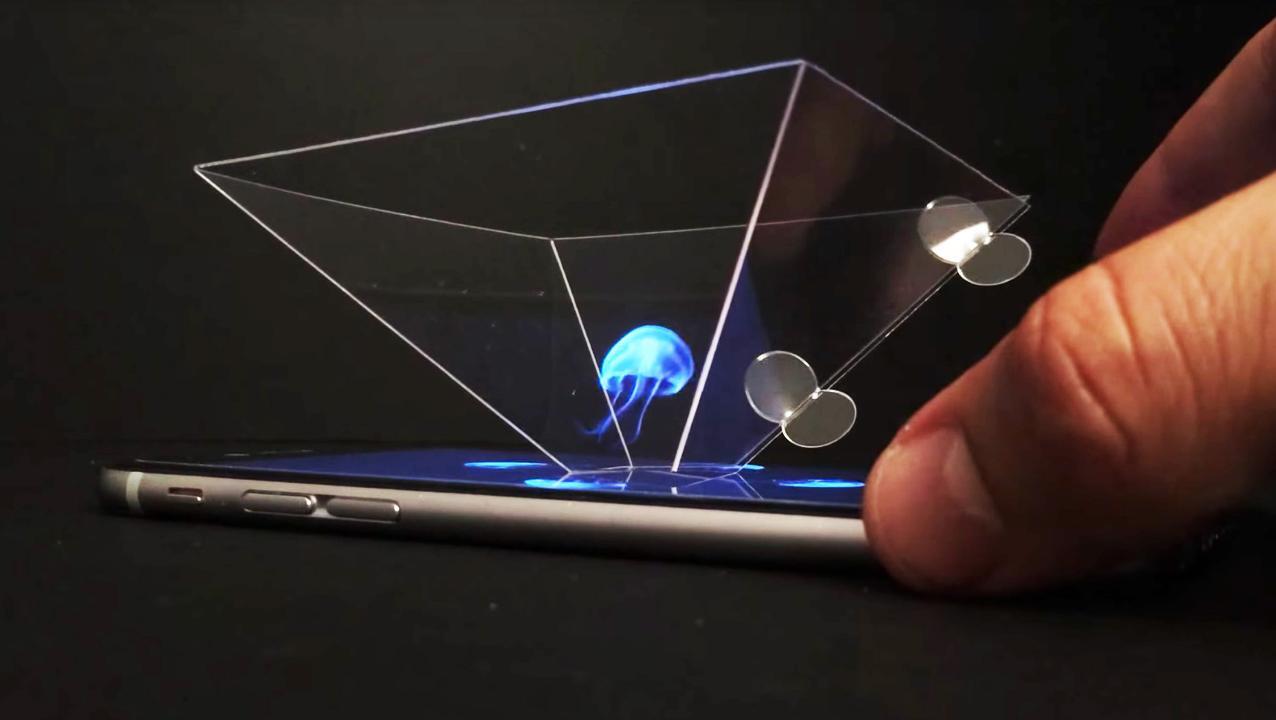
Young and old will be impressed by the magic of the homemade 3D animated image. Indeed, the image displayed on the screen of the mobile phone placed horizontally goes into three dimensions and can be animated, by placing a simple inverted pyramid in the middle of the screen. However, the images must come from a video specially created for this optical illusion effect.
Let me show you the steps.
1. Preparation
You will need some materials before you start your miniature hologram project:
- Plastic CD case, ideally not too used or scratched
- Cutter with a good blade
- Ruler
- Template for phone or tablet or pen and paper
- Scotch tape
- Krazy glue (optional)
- Cutting mat (optional)
Although it is possible to choose a flexible plastic material that can be easily cut with scissors, it is better to opt for semi-rigid plastic. This is a prerequisite for easier assembly. Semi-rigid plastic, like a CD case, has better optical properties than soft plastic. Its assembly is also easier.
If you cannot find a CD case, it is possible to buy semi-rigid plastic on specialized DIY sites.
2. Create or print your template
Depending on the size of your phone or tablet, the templates will be different. Finding the right template is easy with a little research. Here is an example in this link.
Otherwise, it is possible to create your own template.
Most of the time, you will need to draw an isosceles triangle 3.5 cm in height and 6 cm in large base, and 1 cm in small base to obtain the truncated pyramid. The ideal is to start at the top with the small base of 1 cm before tracing the oblique sides and the large base.
If a tablet is used instead of a smartphone, it is enough to increase the dimensions of the four sides of the pyramid. This precaution makes it possible to maintain the proportions and to obtain the same quality of holographic images.
Thus, for a tablet, it is advisable to widen the large base of each side to 10 cm, to increase the small high base to 2 cm, and the height of each triangle to 7 cm instead of 3.5 cm.
3. Cut your paper template
Once you have your stencil, cut out the middle so that only the outer edges remain. This paper model will be the base of your hologram.
4. Cut the plastic shape
Secure your template on your CD case with scotch tape. I recommend using a ruler to be more precise.
This will make things much easier. I also recommend doing multiple light-medium cuts instead of a unique heavy one. You are less inclined to crack the plastic and your cut will be more precise.
When handling the cutter, more specifically during cutting, it is recommended to hold the tool firmly and assuredly. The cutting quality and the final result depend on it.
At the end, you’re supposed to have 4 identical pieces of plastic. Now, you're ready to assemble your hologram projector.
5. Put the pieces together
The assembly of the four faces of the pyramid is the next step. To make it:
- Place two triangles side by side and connect them with a piece of tape or transparent adhesive tape
- Place the other two faces, previously assembled with tape, against the two previous ones
- Join the four faces by their sides by bending them, and checking that they touch each other well
- Tape the truncated-point pyramid with pieces of tape
- Check that there is no space between the angles
- Glue the angles using super glue, putting a few dots of glue in several places of the angles, at the truncated tip, and at the base
- Remove the pieces of tape if necessary, being certain that the structure is stiffened by the glue and after an adequate drying time
6. Find a specific video for projecting holographic images
To make a hologram with your smartphone, you have to find a specific video.
This must display 4 identical images specially arranged on the screen of the mobile phone, so that the pyramid can be placed in the middle.
To find one, simply go to a special video content search engine, then enter the terms “hologram”, “video” and/or “pyramid”.
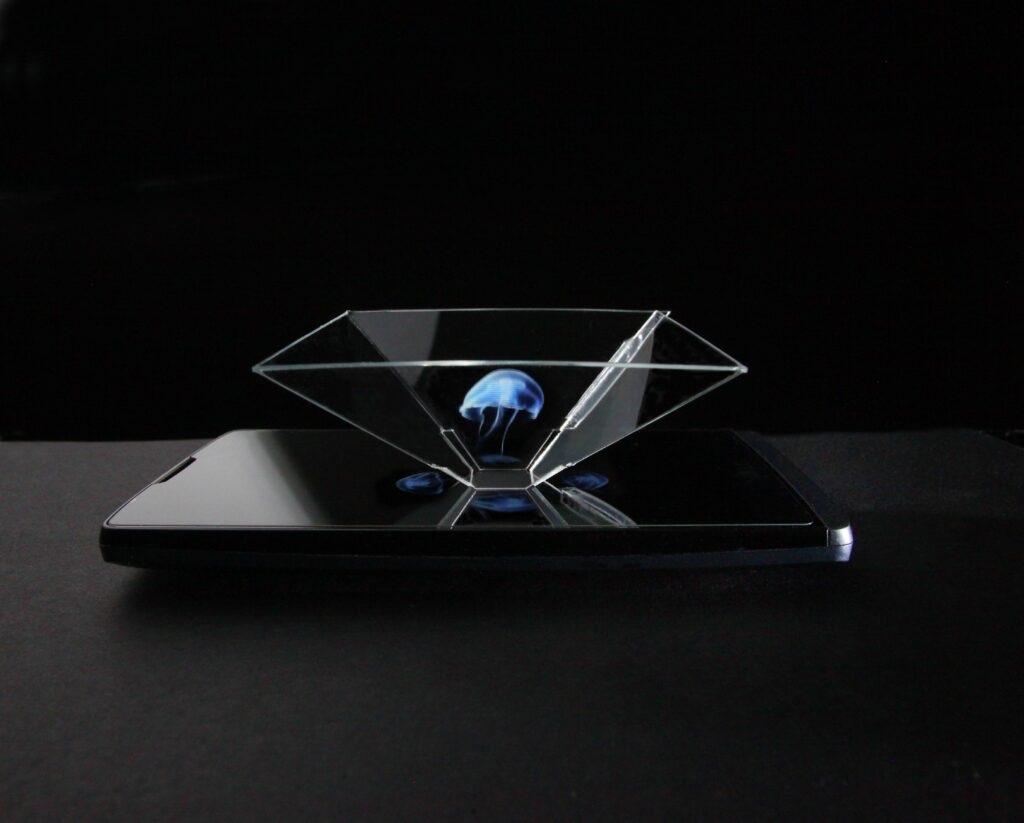
7. Enjoy your home-made hologram
Place your pyramid upside down (wide opening upwards) in the center of the image.
Close the lights, and enjoy!
Here’s a sample video on which you can try your hologram :
Some tips
Once the special video has been downloaded, some precautions should be taken. To better appreciate the special effect, it is preferable that the experience take place in a dark room.
Once everyone is settled, start the video, place the cut-point pyramid in the middle of the four images, and watch the mini-show.
The holographic images are produced by the reflection of the patterns displayed on the screen on the faces of the inverted pyramid.
This is why it takes a special video with 4 images broadcast at the same time and arranged in a specific way to obtain the hologram. In order to enhance the special effect, do not hesitate to increase the brightness of the screen, while making sure to turn off the light in the room.
Today's technologies make it possible to produce particularly sophisticated holograms and to create very realistic illusions, especially for television and shows. More and more brands are using holograms.
With a little practice, anyone can create stunning 3D holograms using nothing more than a cell phone and a few inexpensive supplies. So why not give it a try? You might be surprised at what you can achieve.
We hope you found this tutorial on how to make a hologram informative and fun.
If you’re looking for more ways to create stunning visuals that will WOW your audience, be sure to contact us.
Our team of experts can help you bring your next event or product launch to life with spectacular life-size holograms that are guaranteed to leave a lasting impression.